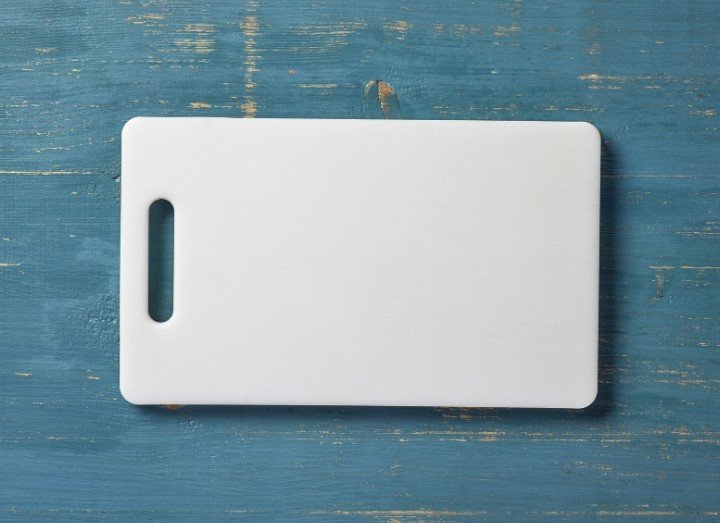
A few dings and minor scratches on any cutting board are typical, but what if there are deep gouges that are making it difficult to clean or cut on?
Before you rush to buy a new cutting board, consider resurfacing your old one. As long as it doesn’t have cracks or deep crevices, you can breathe new life into a worn cutting board instead of replacing it.
After cooking in professional kitchens for 15 years and as a frugal parent who wants to get the most out of their kitchenware, here’s a guide to making your cutting board surface new again.
In This Article
How To Sand And Resurface Your Plastic Cutting Board
What You’ll Need
- A clamp or two. Not 100% necessary, but will make the job 100 times easier.
- Steel wool.
- 80-220 grit sandpaper (ideally with an electric sander).
- A drop cloth to keep the plastic debris contained. Newspapers or a trash bag work well for this.
- Eye protection.
- Dust mask.
Prepare Your Work Area And Cutting Board
First, prepare your work area by covering the surface with towels, newspaper, a large trash bag, or other drop cloth of your choice. This will help catch any plastic debris and make cleaning a little easier.
Next, clamp the cutting board to the table or counter. If you can, prepare a space outdoors or in a garage. That way, you don’t risk spreading plastic debris throughout your house.
Two clamps are ideal, but one will work. With one, you’ll have to use a free hand to apply pressure on the other side of the board while you work. The important thing is to keep the board stabilized.
Protective eyewear and a mask are highly recommended as they will keep debris from getting into your eyes and breathing in any plastic dust. It can get quite messy!

Pro-tip: If you have a lot of plastic wrap on hand, consider covering your workspace with it. You can wrap up all the plastic debris into a ball for easy disposal!
Scrape The Surface With Steel Wool
To prepare the board for sanding, scrape your plastic cutting board with steel wool to remove any loose plastic.
Pay special attention to deeper grooves or any plastic protrusions. Scraping with the steel wool will prepare the board and make the next step easier. A bumpy or overly rough surface will wear out sandpaper faster and potentially tear it.
Sand The Surface
With your sander of choice (or by hand…), sand the entirety of the surface in circular motions. Then, sand lengthwise with back and forth motions, and finally crossways with back and forth motions.
While you’re doing this, frequently wipe the surface of debris to prevent excess plastic from gumming up on the surface or on the sandpaper. Repeat these movements until the top layer is removed.
I’ve had success using a rotary sander and 220 grit sandpaper. But you can also use an orbital or belt sander instead. I prefer using a rotary sander because it doesn’t vibrate as aggressively as an orbital sander.
If you don’t have an electric sander, sanding by hand will work but will take a lot more time and effort. At the very least, I would recommend buying an inexpensive sanding block.
Consider starting with a coarser grit and progressing to 220 grit. For most cases, I’ve been able to get the job done using only 220 grit. But, if you find that you’re not making much progress, use a coarser grit and then work your way back up.
Clean The Board
After sanding the cutting board, wipe away any loose plastic debris and dust. I like to use a hand vacuum at this step, but a small brush and dustpan work as well.
Then, before you rinse the board, wipe away any remaining plastic using a damp towel.
Finally, rinse and wash your board under the sink with soap and water. Feel free to run it through the dishwasher after you’ve dusted and rinsed any remaining debris.
Pro-tip: Don’t rinse any plastic down the sink drain. Plastic particles can settle in your pipes and cause major headaches!
When To Cut Your Losses & Buy A New Cutting Board
Deep fissures can harbor bacteria or mold and make for an uneven and unpleasant cutting surface. Resurfacing a board is the best idea that can save some money, as long as the blemishes aren’t too severe.
If your cutting board has deep gouges, about a quarter-inch or more, or cracks that look like the board is going to break, it might be time to cut your losses.
I try to resurface my plastic cutting boards every few months. But I use them A LOT, so this has saved me many trips to the store.
If a cutting board looks like it’s about to break or has a deep fracture that runs a significant length of the board, resurfacing it isn’t going to help too much. Luckily, you can find a quality plastic cutting board for under $25.
Or, consider spending a little more for a thick, heavy-duty cutting board. They stay put better during use, won’t warp, and can be used and resurfaced for years and years.
Frequently Asked Questions
Can you resurface a cutting board?
You can resurface a cutting board with a sander as long as the cuts aren’t too deep.
How long does a plastic cutting board last?
Plastic cutting boards can last for several years with proper care. It’s time to replace them when they break or develop deep crevices.
How do you clean a dirty plastic cutting board?
You can run a dirty plastic cutting board through the dishwasher or clean it by hand with soap and hot water.