Have you had mixed results making sourdough bread? If your bread has been turning out dense and hard upon baking, you probably need a stronger sourdough starter.
With a strong starter, your sourdough bread will ferment more quickly and rise faster in the oven. This creates those tall, chewy artisan loaves you’ve been dreaming of.
While fixing a weak starter may not always be a one-step solution, there are ways to troubleshoot and determine what it needs. So here’s a list of 6 ways to invigorate your sourdough starter, along with descriptions of which problems each is best for.
In This Article
Know When Your Starter Needs Help
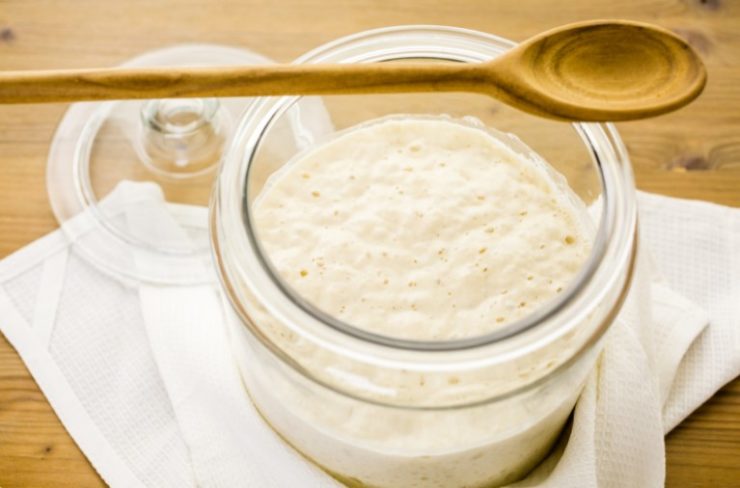
A healthy starter should be bubbly, spongy, and doubling in volume within 4-6 hours of feeding. If you’re not seeing that much activity, your starter could probably use a boost.
Do you have a new starter that’s several weeks old, but it’s not consistently doubling in size? Or does it seem rather thin, with minimal bubbles? In these cases, your starter could benefit from some fortification.
Another sign that your starter may need strengthening is if your loaves aren’t rising or if there’s no “sour” flavor or aroma to the bread you’re baking.
No matter the reason, if you suspect your starter is underperforming, you can try any of these methods without worrying that you’ll do further damage. And the good news is that once your starter is operating in tip-top shape, it’s easy to maintain.
8 Ways to Strengthen Sourdough Starter
1. Rye Or Whole-Grain Flour Booster
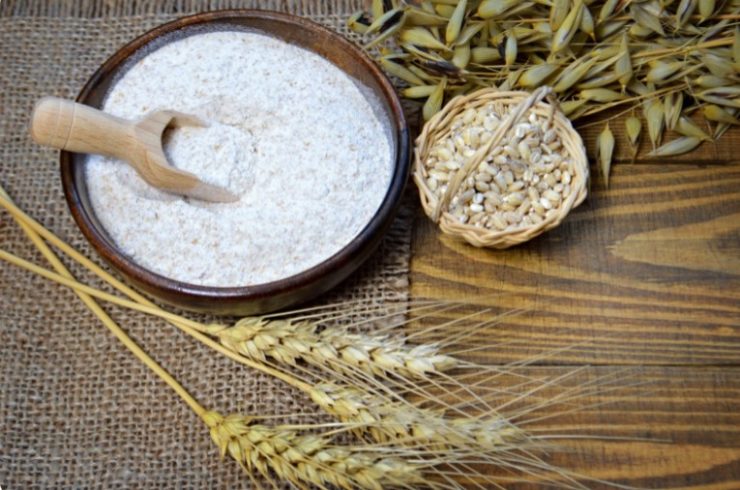
Boosting your starter with whole-grain flour, particularly rye, has multiple benefits. This is an excellent first step for almost any situation when you think you have a weak starter.
If you don’t have rye, whole-wheat flour is second best. If you can find freshly-milled whole wheat flour, that’s even better, as it has more beneficial microorganisms.
This solution works well because the outer bran and inner germ in whole grains contain more natural yeasts and nutrients. These feed all the beneficial yeasts and bacteria in your starter, making it more active and resilient.
To use rye flour to boost your starter, replace half of your normal flour with rye at each feeding for 3-5 days. Your starter should get noticeably more active within that time. It will be more bubbly and smell yeasty and slightly sour.
As always, when feeding a starter, be sure to discard half of it before each feeding.

Pro Tip: Use your sourdough discards to make sourdough-flavored recipes! Try it in pizza, pancakes, and flatbread recipes.
2. Feed It More Frequently
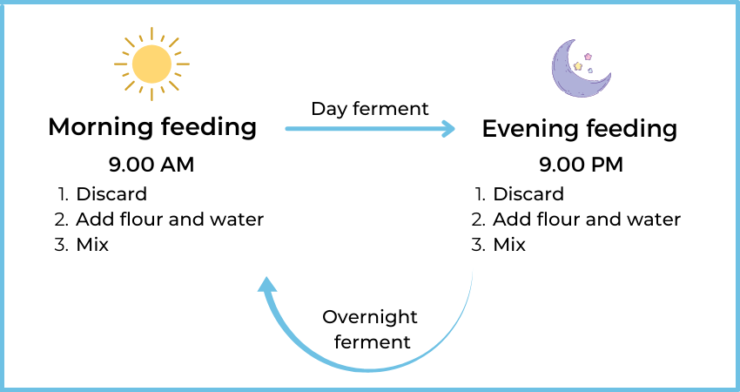
This is a strengthening method that can help in most situations. If you’ve neglected your starter by not feeding it for too long, its yeast activity will slow down significantly. It may take forever to double or may not be doubling at all. In that case, try this fix.
All you have to do is make room in your busy schedule to feed your starter three times a day. But don’t worry, you’ll only need to do this for 2 days to get a more active starter.
3. Increase Your Water And Flour Ratio
If a layer of alcohol-scented liquid, commonly called “hooch”, forms on your starter, that means it hasn’t been fed often enough.
Luckily, that liquid is safe and can actually be stirred back into the starter before feeding it again.
To fix this problem, increase your feeding ratio to 1:2:2, or one-part starter, two parts flour, and two parts water. Do this at every feeding for 3-5 days, and your starter’s aroma and hydration level should even out again.
4. Improve Oxygen Flow

It’s possible your starter hasn’t been getting enough oxygen to feed its beneficial yeasts and bacteria. So if you’ve been keeping a tight lid on your starter, try this instead.
Cover your starter container with a coffee filter, paper towel, or a tightly woven kitchen towel. Then secure it with a rubber band.
Another way to increase oxygen exposure is by stirring your starter once or twice between each feeding.
5. Lower The Water Content
If your starter has been looking thin, liquidy, and listless, try this method.
There’s no one surefire reason why your starter can end up too thin. Sometimes this occurs when there’s too high a water to flour ratio, improper measuring, or too high a temperature in your kitchen.
Additionally, if your starter also smells boozy (see #3), it could be that you’re not feeding it often enough.
To fix a watery starter, instead of feeding flour and water, omit the water and only feed flour to your starter for 1-2 feedings. This should bulk it up and increase activity.
Consider doing this with 50% rye flour to give your starter extra nutrients at the same time.
Once your starter has livened up and has a better consistency, return to feeding it normally at a 1:1:1 ratio. That’s equal parts starter, flour, and water.
6. Check The Temperature
If it’s too cold or too hot in your kitchen, this can affect the activity level of your starter. The ideal temperature range for starters is between 75-80°F (24-27°C).
If the ambient temperature is too cold, the yeast and bacteria will proliferate at a snail’s pace, or slower. And if it’s too hot, the delicate balance of microorganisms in your starter will begin to die off.
So try to stick to this ideal temperature range as you’re reviving your starter. Then, once it’s healthy again, you can move it to the refrigerator if you prefer.
7. Use Filtered Water

The chlorine found in tap water kills microorganisms, keeping us from getting sick. Unfortunately, this also means it can kill off the “good” microorganisms in your starter.
I can’t guarantee that this will strengthen your starter. But if you’ve been using unfiltered tap water in a problematic starter, this could eliminate a factor that may be affecting it.
Use water that has gone through a charcoal filter to avoid chlorine. Alternatively, you can use previously boiled water (make sure it’s cool before using), or leave your water out overnight to let the chlorine evaporate.
8. Starter Overhaul
If you’ve already tried a couple of these remedies and can’t seem to figure out what’s wrong, this partial overhaul can be a helpful last resort.
This will also work for that neglected starter from the back of your fridge!
Start with 50g of starter in a fresh, clean container. Add 50g water and 50g flour. Mix it together, then mark the height of your starter on the outside of the container.
Cover it with a cloth, paper towel, or coffee filter as described above in number four.
Come back to check on it 12 hours later. If the starter has almost doubled, wait a full 24 hours after the time you mixed it to feed it.
If after that first 12 hours the starter is nowhere near close to doubling, feed it again.
Repeat this process until the starter is doubling within 12 hours. Once this happens, go back to feeding it once every 24 hours.
At this point, it’s important to keep your starter out at room temperature for 4-5 days, feeding it once a day.
After that, you can keep it in the fridge and feed it once every week or two to keep your starter alive and healthy.
Final Tips on Strengthening Starters
Believe it or not, sourdough starters in shockingly poor condition can usually still be revived. Even if it smells like hooch, it’s most likely still salvageable.
Take note, however, that if you have a neglected starter that’s moldy or pinkish, you’ll want to toss it and start over.
Once you find the right fix for your starter, you’ll be glad you took the time to do it. Your bread will rise better, taste better, and have an improved texture, too.
FAQs
How do I know if my sourdough starter is strong enough?
A strong sourdough starter should be doubling in volume within 4-6 hours of feeding it.
Why is my sourdough starter not very active?
It could be that it hasn’t been fed frequently enough, it’s too cold or too warm, or it needs more oxygen flow.
How can I make my starter more active?
Try feeding it more frequently to start, 2-3 times a day. Or switch out 50% of your regular feeding flour for rye flour for 3-5 days of feedings.