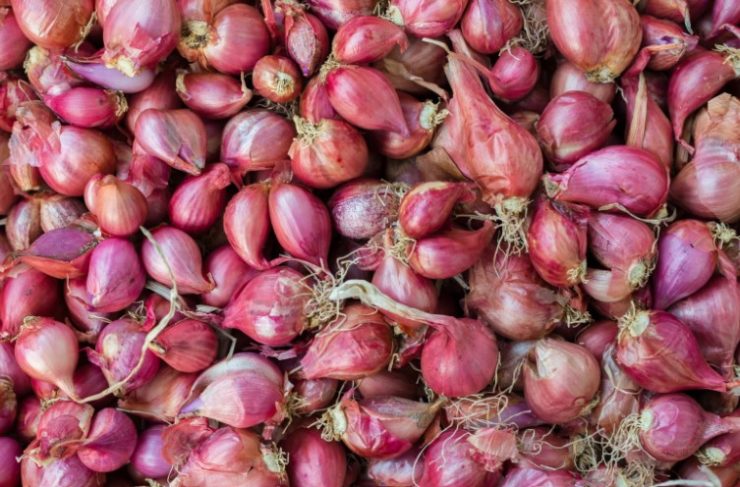
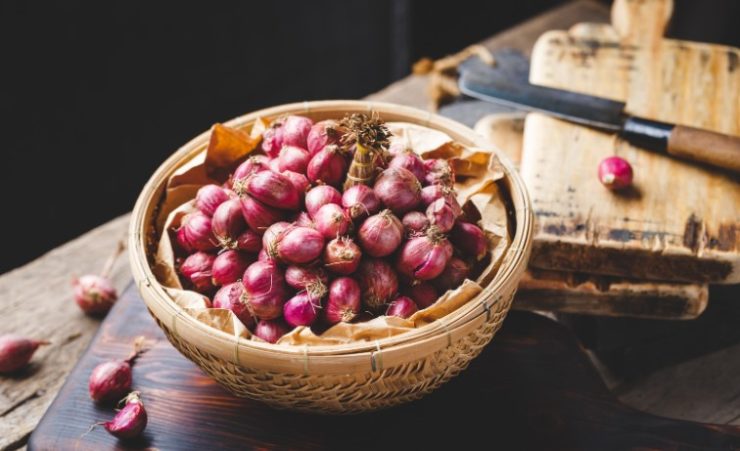
Shallots, how do I love thee? Let me count the ways…
Ask most chefs and I would guess shallots are in their top 10 essential ingredients. For me, it might even break the top 5. A perfect balance of sweet and savory, and endlessly versatile.
When it comes to peeling them though, they’re up there with garlic as being somewhat of a pain, even if they are worth it.
After over a decade of cooking in professional kitchens, I’ve peeled countless shallots. And while the process is straightforward, I’ve learned some tips and even an entire method that can make the process of peeling shallots a little easier for everyone.
In This Article
2 Ways To Peel A Shallot
Method 1: With A Knife
Peeling shallots with a knife (and your hands) is similar to peeling garlic. Only on a much larger scale, and you can’t smash your shallot to help get the skin off quicker. This process can be a little tedious, but you’ll end up with very little waste and peeled shallots that are in the best possible condition.
1. Trim Top And Bottom
The first step to peeling a shallot is to remove the top and bottom end. Most shallots taper to a thin point on top and have a little tuft of dry roots at the bottom. You want to get rid of both.
Lay your shallot on its side on a cutting board and hold it in place with your non-dominant hand.
Then, use a sharp knife and cut off the thin tip of the shallot.
Rotate the shallot 180 degrees and give it a little haircut by removing the curly roots. You want this cut to be as shallow as possible. Just enough to remove the roots.
If you cut off too much of the bottom you’ll end up removing the basal plate. That’s where all of the layers of the shallot connect. Keeping this intact will make cutting the shallot much easier later on.
2. Make A Shallow Incision
To get the peeling process started, use the tip of your knife and make a shallow incision in the shallot.
With this cut, you only want to pierce the outer, brown, papery skin layers of the shallot. While it can be tempting to cut deeper and peel away the first couple of layers of the actual shallot flesh, you’ll end up with a lot of waste. And shallots ain’t cheap.
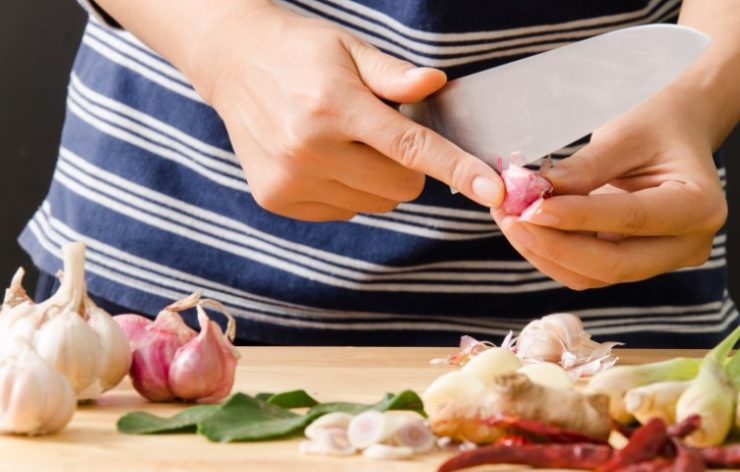
3. Peel
At this point, there are a couple of different approaches you can take.
In culinary school and high-end kitchens, I was taught and made to use a knife. In my opinion, this isn’t the easiest way to peel at home, but since it’s the “classical” way I’ll cover it first.
To do this, start at the incision you made and use the heel of your knife to get between the last layer of skin and the first layer of the usable shallot.
Then, use your thumb to pinch and hold the skin against the knife as you pull down to peel. Repeat until all of the skin is removed. A paring knife is the best option here because they’re small and easy to maneuver in one hand.
The idea behind using a knife here is that it’s precise and should result in less waste. And, as I was told, “we’re refined, civilized cooks and we don’t use our fingernails as peelers”.
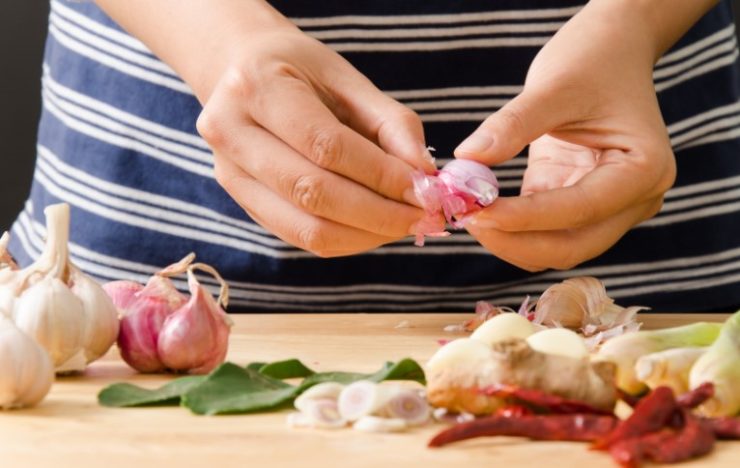
In the real world though, fingers are totally acceptable and preferred for speed and ease.
So if you’re not trying to impress anyone, feel free to use your fingers to peel away the skin starting at the incision you made in step 2.

Pro Tip: Shallot skins, tips, and roots are all great additions to a batch of chicken or vegetable stock. And if you’re not planning on making a batch right away, toss your trim into a freezer bag with other veggie scraps until you have the ingredients and time to make some.
Method 2: By Blanching
Blanching your shallots before you peel them loosens the skin and barely cooks the outer, usable layer of the shallot. This can be a great trick to speed up the process if you have to peel a lot of shallots, but be careful not to cook them for too long.
1. Blanch
First, place any shallots that you’ll be peeling in a large, heat-proof bowl. If any shallots are connected in a bulb, be sure to separate them so that they “cook” more evenly.
Now, pour enough boiling water over the shallots to thoroughly cover. And set a timer for 3 minutes.
The goal here is to soften the papery outer skin and cook the shallot itself as little as possible. So if you’re dealing with very small shallots you might want to start with a shorter 2-minute timer to ensure they don’t overcook.
If you don’t have a large enough bowl, or if you just prefer, you can do the same process directly in a pot of boiling water. Simply add them to the pot and use a spider to remove them once the time is up.
2. Shock
Again, the goal of the blanching method is not to actually cook the shallot beneath the peel. So as soon your timer goes off we need to completely stop the cooking process by shocking them in cold water.
The best way to do this is to transfer the shallots from the hot water and place them directly in another bowl filled with ice water (ice bath).
Alternatively, you can run them under cold water to cool them down. But, this takes longer, wastes a lot more water, and there’s a high risk that at least some of the shallots will end up overcooked.
3. Trim Top And Bottom
After shocking, your shallots should be all ready to shed their skin. To get the actual peeling started, lay your shallots on a cutting board and use a sharp knife to trim off the thin top and the rooty bottom.
Be sure to wait until after you do your blanching and shocking to remove the tops and bottoms. If you do it beforehand hot water will seep in between the shallot’s layers and end up cooking the insides.
4. Squeeze And Peel
If all went well, you should now be able to simply squeeze the shallot out of its skin. And you should be left with a raw peeled shallot.
If you’re dealing with a lot of shallots, this is where the extra effort of blanching and shocking becomes worth your while.
At this point, if the shallots don’t easily slip out of their peels, they should still be relatively easy to scrape and peel off with your fingers or a knife.
Frequently Asked Questions
How Far In Advance Can You Peel Shallots?
Shallots are at their best when peeled and used the same day. However, you can peel shallots and store them in an airtight container in the fridge for about a week.
How Should You Prepare A Shallot?
Shallots are very versatile. You can use them just about anytime you would normally use regular onions, but you’ll get a milder and sweeter taste. Try using them at the beginning of a stir fry, pickled, deep-fried, or raw.
Are There Any Good Substitutes For Shallots?
Red onions, sweet onions, and spring onions are all decent substitutes for shallots. Just remember that most options are likely to have a stronger, more oniony taste.